


What Does the DTF T-Shirt Process Include?

You've heard the buzz about DTF (Direct-to-Film) T-shirts – their vibrant colors, incredible detail, and impressive durability.
But what exactly goes into making one of these custom tees? At House of Printed Expressions, we believe in transparency and empowering our customers with knowledge. So, let's pull back the curtain and explore the step-by-step process of creating a custom DTF T-shirt.
This isn't just about ink on fabric; it's a meticulously crafted process that ensures your design looks fantastic and lasts for years to come.
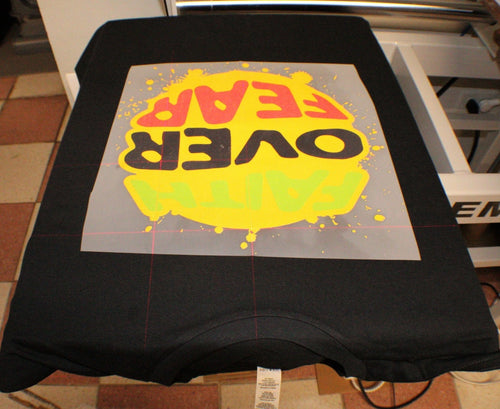
Place
Position your DTF (Direct to Film) Transfer on top of your product.

Press
Press at 302°F for 12–15 seconds with heavy pressure.

Peel
Wait 3–5 seconds then peel.
Step 1: Your Vision & Design Preparation
Every great custom T-shirt starts with a great design.
- Your Artwork: You provide us with your logo, graphic, or custom artwork. For the best results with DTF, we recommend high-resolution images, preferably with a transparent background (like a .PNG file). This ensures crisp edges and vibrant colors.
- File Optimization: Our team will review your file to ensure it's print-ready. We'll check resolution, color modes, and make any necessary adjustments to guarantee a perfect print. If your design has white elements, DTF excels at reproducing them vividly, even on dark shirts, thanks to its white ink layer.
Step 2: Printing onto the DTF Film
This is where the magic begins!
- Specialized Film: We load a unique DTF transfer film into our high-tech printer. This film is designed to hold the ink and release it cleanly during the transfer process.
- Ink Application: Our DTF printer uses specialized CMYK (Cyan, Magenta, Yellow, Black) inks, along with a crucial white ink.
- First, your design's colors are printed onto the film.
- Immediately after, a precise layer of white ink is printed directly on top of the colors. This white layer acts as a base coat, ensuring that your colors truly pop and are opaque, especially when applied to dark-colored garments.
Step 3: Adhesive Powder Application
This step is key to making the design stick.
- Powder Application: While the inks are still wet on the film, a fine, thermoplastic adhesive powder is evenly applied over the entire printed surface. The powder naturally clings only to the wet ink.
- Excess Removal: The film is then agitated or vibrated to remove any excess powder, leaving the adhesive only where your design's ink is present. This prevents unwanted adhesive residue on your final T-shirt.
Step 4: Curing the Transfer (The Baking Phase)
Now, we set the adhesive.
- Melting the Powder: The film, with the powdered design, is passed through a curing unit (often a specialized oven or heat tunnel). The heat melts the adhesive powder, causing it to bond with the ink and form a smooth, solid, and durable layer over your design.
- Ready for Transfer: Once cooled, the design on the film now has a robust, flexible, and perfectly formed adhesive backing, making it a complete DTF transfer ready for application.
Step 5: Heat Press Application to the T-Shirt
This is where the design meets the garment.
- Garment Preparation: Your chosen T-shirt (whether it's cotton, polyester, a blend, or even nylon!) is carefully laid flat on a commercial heat press.
- Positioning the Transfer: The cured DTF transfer is meticulously placed onto the T-shirt, with the design facing down. Precision is key here to ensure your design is perfectly aligned.
- Heat and Pressure: The heat press is then closed, applying a specific combination of high heat and pressure for a precise duration. This process reactivates the adhesive on the transfer, causing it to permanently bond with the fibers of the T-shirt. The controlled pressure ensures an even and strong bond across the entire design.
Step 6: The Peel and Finishing Touches
The grand reveal!
- Peeling the Film: Once the pressing cycle is complete and the T-shirt has cooled down (depending on the type of film used, this might be a hot peel or a cold peel), the DTF film is gently and smoothly peeled away from the T-shirt. What's left behind is your vibrant, detailed design, seamlessly integrated into the fabric.
- Final Inspection: We conduct a final quality check to ensure the print is flawless, the colors are accurate, and the adhesion is perfect.
Why This Process Benefits Your Custom T-Shirts
Understanding these steps highlights the key advantages of choosing DTF for your custom T-shirts:
Print on almost any fabric type and color, including cotton, polyester, blends, and even dark garments, with equally stunning results.
The white ink underlayer ensures colors pop with incredible vibrancy and allows for fine details that stand out.
The specialized inks and strong adhesive create a flexible print that resists cracking, peeling, and fading, ensuring your T-shirt looks great wash after wash.
Unlike some other methods, DTF prints can have a relatively soft and flexible feel on the garment.
At House of Printed Expressions, we pride ourselves on mastering the DTF T-shirt process to deliver high-quality, long-lasting, and visually stunning custom apparel.